The short answer
- Cover at seeding or transplanting, before pests arrive. Row covers keep insects out; they don't get rid of pests that are already there.[1][2][4][5]
- Seal every edge, by burying it or weighting it along its whole length, and patch holes with tape.[1][2][6][4]
- Rotate crops. Flea beetles, onion and seedcorn maggots and squash vine borers overwinter in garden soil, and a cover over last year's bed can trap them in with the crop.[1][3][5][4]
- Take covers off squash, cucumbers and other insect-pollinated crops when they begin to flower, so bees can reach the blossoms.[1][2][3][6][5]
- Look under the cover regularly. Aphids, spider mites and whiteflies that get in can build up faster than in the open, away from their natural enemies.[2][5][6]
Pests row covers keep off
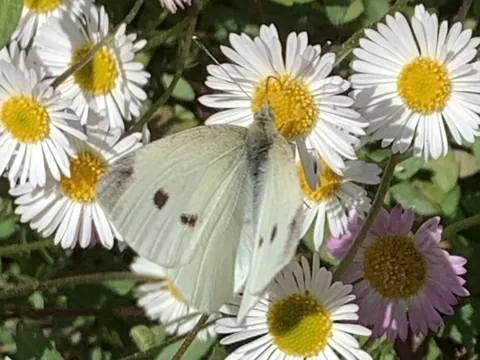 Imported Cabbageworm
Pieris rapae
The imported cabbageworm is the caterpillar of the familiar small white butterfly, the cabbage white. It chews ragged holes in cabbage, broccoli, cauliflower, kale and other cole crops, and it bores into heads as it grows.
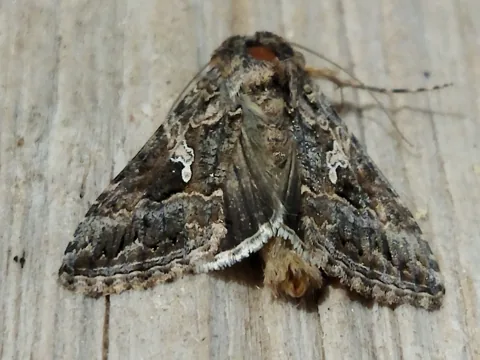 Cabbage Looper
Trichoplusia ni
The cabbage looper is the caterpillar of a gray-brown moth that flies mainly at night. It chews ragged holes in cabbage-family crops and many other vegetables and flowers, and it crawls by looping its body like an inchworm.
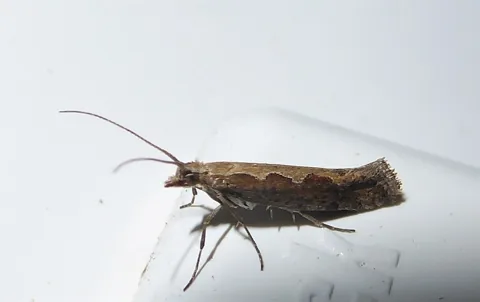 Diamondback Moth
Plutella xylostella
The diamondback moth is a small moth whose caterpillars feed on cabbage, broccoli, kale and other cole crops. Natural enemies often keep it in check in California, but it has developed resistance to many insecticides.
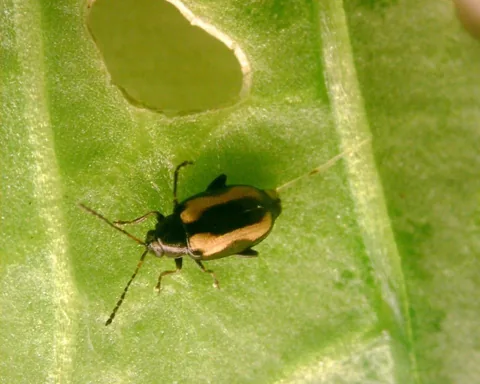 Flea Beetles
Phyllotreta striolata
Flea beetles are tiny, shiny beetles with enlarged hind legs that jump like fleas when disturbed. Adults chew small holes and pits in the leaves of radishes, cabbage and other crucifers, eggplant, potatoes, tomatoes and many other vegetables, and they do the most harm to seedlings in spring.
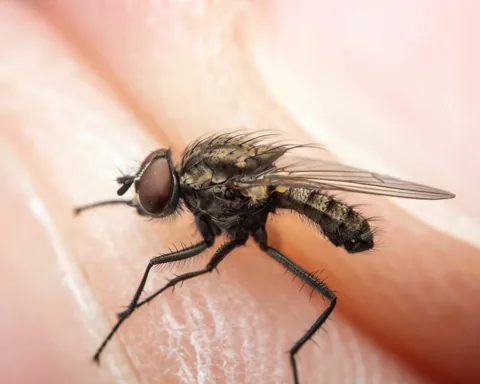 Seedcorn Maggot
Delia platura
When beans, corn or other seeds fail to come up in a cool, wet spring, seedcorn maggots feeding on the germinating seeds are a likely cause.
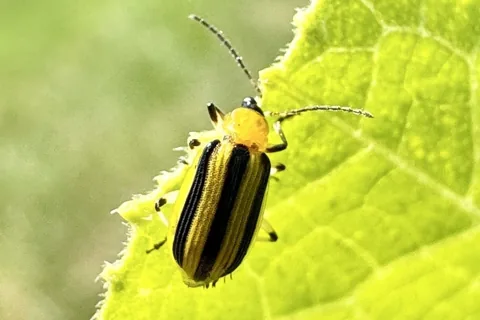 Striped Cucumber Beetle
Acalymma vittatum
Cucumber beetles are small yellow-and-black beetles that feed on squash, cucumbers, melons and other cucurbits. The striped cucumber beetle is the main concern because it can carry bacterial wilt into cucumbers and muskmelons.
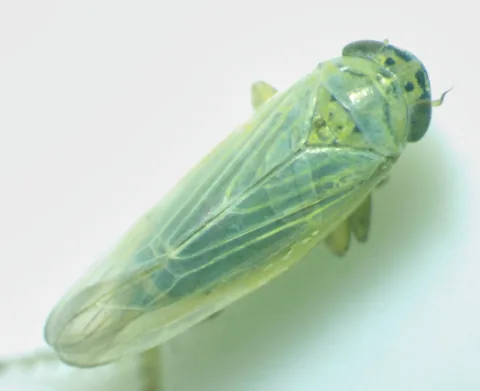 Aster Leafhopper
Macrosteles quadrilineatus
The aster leafhopper, also called the sixspotted leafhopper, is a small leafhopper whose own feeding does little harm but which is the main carrier of aster yellows, a plant disease caused by a phytoplasma (Candidatus Phytoplasma asteris).
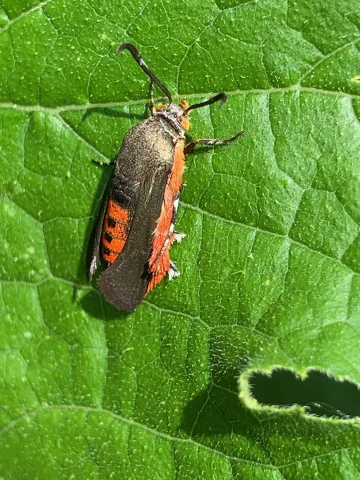 Squash Vine Borer
Eichlinia cucurbitae
The squash vine borer is a day-flying clearwing moth whose caterpillars feed inside the stems and crowns of summer squash, winter squash and pumpkins. A vine that wilts suddenly in midsummer is often the first sign, and in a bad year home gardens and small farms can lose the whole crop.
No photo yet
Onion Maggot
Delia antiqua
The onion maggot is the larva of a small gray fly; it feeds below ground on onions and their relatives, killing seedlings and tunneling into bulbs that later rot.
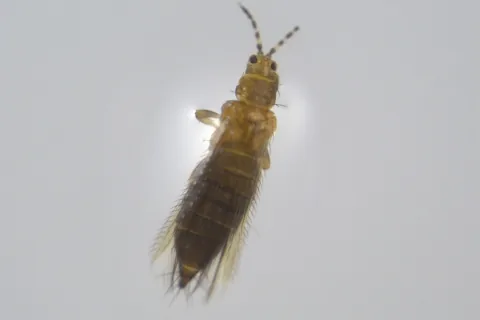 Thrips
Frankliniella occidentalis
Thrips are tiny, slender insects with fringed wings that scar and distort leaves, flowers and fruit. Woody plants usually tolerate them, but flowers, vegetables and young plants can be hurt badly, and thrips are hard to control.
What row covers are and what they keep out
Floating row covers are spun-bonded or woven plastic, polyester or polypropylene fabrics placed over plants. They keep pests out, block wind and hold in heat, while still letting light, water and air through.[1][4]
They're a mechanical barrier: they keep insects, and in some cases the plant diseases insects spread, away from young plants.[2][5][6]
Utah State adds that the same barrier keeps birds and mammals off the plants, and that keeping insects out means fewer insecticide sprays and fewer insect-spread diseases.[5][6]
UW-Madison Extension lists these pests and problems that row covers can reduce:[1]
- Caterpillars on cabbage, broccoli and cauliflower: imported cabbageworm, cabbage looper and diamondback moth.[1]
- Flea beetles on cabbage, potato, eggplant and leafy greens.[1]
- Onion maggot on onion.[1]
- Seedcorn maggot on beans, corn and other crops.[1]
- Early-season cucumber beetles on cucurbits.[1]
- Thrips on a variety of plants.[1]
- Aster yellows, a disease spread by the aster leafhopper, on carrot, celery, lettuce and many flowering ornamentals.[1]
- Squash vine borer: covers placed over squash while the moths are flying keep them from laying eggs on the plants.[3]
Choosing a fabric
The material needs to be light, breathable and durable.[2]
Washington State and Utah State give the same figures for the three weights: lightweight fabric (0.45 ounce per square yard) lets through 90% of the light, medium weight (0.50 to 0.55 ounce) 85%, and heavyweight (0.90 to 2.0 ounces) 30% to 50%.[4][5]
Sources differ on how much frost protection to expect. Washington State says lightweight covers generally give none, medium weight protects down to 28°F and heavyweight down to 24°F to 28°F. UW-Madison gives 2 to 8 degrees of warming depending on weight, and New Mexico State 2 to 7°F, with 0.5 to 1.25 ounce covers giving 2 to 6°F in spring.[4][1][6]
- Lightweight covers are the cheapest and suit most crops. They protect plants from drying wind but add little warmth, and they're light enough that they generally don't need supports.[1]
- Medium-weight covers hold in heat, which helps crops mature sooner and extends the season in spring and fall. UW lists cucurbits, lettuce, peas, carrots, radishes, potatoes, sweet corn and blueberries as suitable crops.[1]
- Heavyweight covers give 4 to 8°F of frost and freeze protection and can raise daytime temperatures 10°F or more, but they let less sunlight and water through. Tomatoes and peppers may drop their blossoms if it gets above 86°F under the cover.[1]
- For insects alone, a light fabric is enough: New Mexico State says the lighter weights that give little frost protection are generally used to keep insects and birds off crops. They tear easily, though, and Washington State and Utah State say they may last only a few months.[6][4][5]
- Washington State suggests at least a medium-weight cover if you want one that lasts several years.[4]
- The blossom-drop temperature for tomatoes and peppers differs by source: UW-Madison says above 86°F under the cover, while Utah State says some flowers abort when daytime temperatures top 90°F and that it can be 5°F to 15°F warmer under a cover.[1][5]
Putting covers on
- Put the cover on as soon as the crop is seeded or transplanted.[2][1][4][5]
- Check transplants before they go under the cover, so you don't seal insects in the soil or on the plants inside with the crop.[4][5]
- Lay it loosely over low, flexible crops, leaving enough slack for the cover to lift as the plants grow. Use hoops for taller crops and for plants such as spinach whose leaves get scuffed by fabric resting on them; bent PVC pipe pushed into the soil makes an easy frame.[1][4][6]
- Don't lay fabric directly on single-stemmed crops such as tomatoes, peppers, eggplant or squash; New Mexico State says wind can snap their stems. Put these crops under hoops instead.[6][1]
- When the goal is keeping insects out, seal every edge. Bury the edges completely, or hold them down along their full length with boards, poles or water-filled lay-flat irrigation hose. Lumber or rebar holding the edges is enough when covers are only for warmth.[1][2][6][4]
- If you weight the edges rather than bury them, Washington State and Utah State suggest a shovelful of soil or a rock every 3 feet or so along each side. Landscape or metal staples help hold the edges but can tear the fabric.[4][5]
- Lay covers on a calm day, and cut them long and wide enough to reach the ground at both ends and on both sides with room left for the crop to grow. Washington State notes a 6-foot-wide roll covers a 3-foot-wide bed with room for seedlings to grow upright.[6][4][5]
- Repair holes in the fabric with tape as soon as they appear.[2]
- Watch the wind. Steady wind works the edges free of their weights, and high winds can tear the fabric; windbreaks and anchored straps help hold covers in place.[2][5]
Rotate, or the cover can backfire
Some pests, including adult flea beetles and onion and seedcorn maggots, overwinter in garden soil. A cover over a bed where their host crops grew can hold the emerging pests right next to the crop and actually increase damage, which is one reason to rotate related crops to a different spot.[1]
University of Minnesota Extension gives squash vine borer as an example. It spends the winter in the soil near its host plants, so don't cover squash planted where cucurbits grew the previous year: the adults may emerge under the cover instead of being kept out. Plant cucurbits in a different part of the garden, or skip a season.[3]
Washington State and Utah State give the same advice: rotate by plant family so you don't lay a cover over ground where pests laid eggs the year before.[4][5]
Flowering and pollination
Squash, cucumbers and other vine crops depend on insects for pollination. Remove the covers when the plants begin to flower so bees can reach the blossoms, which limits how long covers can protect these crops.[2][1][3][6][5]
Covers can go back on after the pollination period. Opening the ends of a low tunnel lets pollinators in, but it weakens the barrier.[2]
Fruiting crops in general need covers off at bloom: New Mexico State says to remove them so bees or wind can pollinate the flowers, and Utah State's crop table also says to uncover tomatoes, peppers and eggplant when they begin to flower.[6][5]
Some growers place a purchased bumble bee colony under the cover to pollinate the crop instead. Kentucky reports mixed results; the colony may need shading so it doesn't overheat, and the bees need space between the plants and the fabric, so hoops or low tunnels may be needed.[2]
For squash vine borer in Minnesota, UMN's timing is to cover vine crops when they start to vine (late June or early July for bush types) or when you first see adult moths, keep the cover on for about two weeks after the first adult appears, and secure it so moths can't get underneath, while not leaving covers on crops that are flowering.[3]
Check under the cover
Pests sometimes get under a row cover anyway. There they develop and reproduce without natural enemies, and the warmth can speed their development, so aphids, spider mites and whiteflies can build to higher numbers much faster than they would in the open.[2][5][6]
Look under the cover regularly, because a large population can do a lot of damage in a short time. If pests show up, you can take the fabric off so natural enemies can reach them, release purchased natural enemies under the fabric, or pull the cover back for an organic or conventional insecticide application and then replace it carefully.[2][4][5]
Weeds like the shelter too. Lift the covers now and then to pull weed seedlings.[1][5][6]
Summer heat and disease under covers
A cover that helps in spring can hurt in summer. Utah State warns that disease can get worse if covers stay on through the summer, because humidity rises and air movement drops, and that reduced air movement may also cut fruit set in tomatoes and peppers.[5]
Cool-season crops suffer in the heat too. New Mexico State says high temperatures later in the season can lower their quality, so covers have to come off, and that very high temperatures under covers can reduce tomato and pepper yields. Utah State advises checking temperatures under covers on greens grown from mid-June through August, and says covers may need to come off some crops by mid-June to prevent heat build-up and disease.[6][5]
Taking covers off and storing them
- Remove covers gradually so the crop can harden off, and choose a cloudy day for the final removal.[1]
- Store covers out of direct sunlight, because UV light breaks the material down.[1][5]
- Soil particles wear and tear the fabric, so clean covers last longer. Hose dirty covers off and let them dry completely before storing them indoors in plastic bags or containers; Utah State says mice may nest in covers left in sheds, barns or garages.[4][5]
- Heavyweight covers cost the most but can be reused for several seasons.[1][4]
- Deer and other animals can damage covers, so a fence around a covered bed may be worth it.[4][5]
Common questions
- When should row covers go on?
- At seeding or transplanting, before pests find the crop. Row covers keep insects out, so they won't help once pests are on the plants or coming up from the soil underneath.[1][2][4][5]
- Do I have to take row covers off squash and cucumbers?
- Yes, when they begin to flower. These crops need insects to pollinate them, so leaving covers on during bloom keeps bees out. Covers can go back on after pollination.[1][2][3][6]
- Can insects still get under a row cover?
- Yes, through gaps or holes, or by coming up from the soil if the crop's pests overwintered there. Pests that get in can multiply quickly away from their natural enemies, so check under the cover regularly.[2][1][5][6]
- Do row covers protect plants from frost?
- Yes. Depending on the weight of the fabric, UW says row covers give 2 to 8 degrees of warming and frost protection, which can be enough to prevent cold damage or to harvest some crops a week or two early.[1]
- What weight of row cover should I buy to keep bugs out?
- Lightweight fabric, about 0.45 ounce per square yard, is the kind usually sold as an insect barrier and lets through about 90% of the light, but it may last only a few months. Medium weight (0.50 to 0.55 ounce) lasts longer and adds some frost protection.[4][5]
- Can I leave row covers on all summer?
- Usually not. Insect-pollinated crops need them off at bloom, and Utah State and New Mexico State warn that heat, humidity and still air under covers in summer can raise disease, hurt fruit set and lower crop quality.[5][6][1]
Photo credits
- Imported Cabbageworm: (c) eebee, some rights reserved (CC BY) — via iNaturalist, CC BY 4.0
- Cabbage Looper: (c) SteveM4560, some rights reserved (CC BY) — via iNaturalist, CC BY 4.0
- Diamondback Moth: (c) Aalbert Rebergen, some rights reserved (CC BY) — via iNaturalist, CC BY 4.0
- Flea Beetles: 螯蝦, public domain (CC0), via iNaturalist
- Seedcorn Maggot: (c) Zachary Dankowicz, some rights reserved (CC BY) — via iNaturalist, CC BY 4.0
- Striped Cucumber Beetle: (c) L.J. Lamera, some rights reserved (CC BY) — via iNaturalist, CC BY 4.0
- Aster Leafhopper: Ken Kneidel, public domain (CC0), via iNaturalist
- Squash Vine Borer: (c) Zeke Blankenship, some rights reserved (CC BY) — via iNaturalist, CC BY 4.0
- Thrips: (c) Julia Palmer, some rights reserved (CC BY) — via iNaturalist, CC BY 4.0
Sources
- University of Wisconsin-Madison Extension, Wisconsin Horticulture, “Floating Row Cover.” hort.extension.wisc.edu/articles/floating-row-cover/ (accessed 2026-11-10)
- University of Kentucky Entomology, “Row Covers for Insect Management (ENTFACT-322).” entomology.ca.uky.edu/files/ef322.pdf (accessed 2026-11-10)
- University of Minnesota Extension, “Squash vine borers.” extension.umn.edu/yard-and-garden-insects/squash-vine-borers (accessed 2026-11-10)
- Washington State University Extension, “How to Install a Floating Row Cover (FS089E, 2012).” s3.wp.wsu.edu/uploads/sites/2071/2014/04/Install-a-Floating-Row-Cover-FS089E.pdf (accessed 2026-11-10)
- Utah State University Extension, “Row Covers (December 2020).” extension.usu.edu/pests/research/row-covers (accessed 2026-11-10)
- New Mexico State University Cooperative Extension Service, “Row Cover Vegetable Production Techniques (Guide H-251, revised 2019).” pubs.nmsu.edu/_h/H251.pdf (accessed 2026-11-10)